
Thank you for all of the nice things you said after my last post! I have been meaning to share this with you since the beginning of the year, but things kind of got in the way. Back in January, we attended the most highly-anticipated party of the post-party season: The Third Annual Ukrainian Christmas/Pierogi night. One of the things that makes this party perfect is that it is all about eating (and drinking and having fun).

After I made the cake, I nestled it into my favorite cake saver, crossed my fingers that it wouldn’t go stale, and decided to ignore it until the day of the party. The ignoring part was really hard. It was so pretty looking, and I really wanted to peak.

I had bought a fancy bundt pan for the cake, and I was rather excited that it had unmolded so nicely. My last experience with bundts was a bit of a disaster. Now that I had made a beautiful cake, I was quite taken with the idea of bundting. After all, it is quite an exciting process! There is a finger-crossing moment when you unmold it, because you could have not adequately buttered the pan, then the ooh and ahh moment when you see that the design is perfect, and then there is the drizzle! What can be more exciting than that?

Maybe don’t answer that question… Anyway, patience won out, and I didn’t peak. Not even once. A little before the party, I pulled the cake out, mixed up some icing, drizzled it on, and we headed out the door. Up until I tried my first bite I was still nervous that it would be stale. Most cakes are only good for composting after sitting around for 4 days, but this cake was amazing. It was moist and flavorful with the right amount of spice and a hint of sweetness. In other words, perfect. If you have a party coming up, and you need a fancy cake that requires minimal effort on the day of your event, then this is your cake. It will compliment more than just pierogies, kielbasa, and red beets. I know I’ll be making it again!

Notes:
Even though the notes are long, this cake isn’t that hard to make! Grease/oil the measuring cup before you measure out the honey. This will make it easier for the honey to slide out of the measuring cup. Buckwheat honey is preferable for this cake. It has a really intense flavor that mellows over time and really makes the cake special. You could probably use a different kind of honey, but the flavor would be very different. Go the extra step and get the buckwheat! (You can also use it in these cookies if having something in your pantry for just one recipe scares you.) Make sure you leave enough time for the honey to cool before it is added to the butter mixture. Using a larger pan to heat it will give you more surface area for cooling. Make sure your egg whites don’t have any yolk bits in them and the bowl you whip them in is very clean. Any traces of fat will prevent the egg whites from whipping properly. Note that this recipe calls for sifted flour, as in, sift the flour and then measure it. It will be easiest if you sift it onto a large piece of wax paper or a flexible cutting mat. After it is sifted and then measured, the flour should be resifted two more times with the remaining dry ingredients, Use full-fat sour cream. Low-fat sour cream is not going to work for this recipe. When you do the drizzle, cut the TINIEST hole in the bag. You can always make the hole bigger if you need to. My bundt is a 10-cup bundt. I’ll be honest - the batter really filled it up, and I put a pan on the rack below in the oven just in case it dripped. You’ll need at least a 10-cup bundt or tube pan for this. If it is a little bigger, that would work fine/better. Just don’t go any smaller or you will have a serious mess on your hands. Bundt work is a little different than other tube pan work. You’ll want to grease and flour the heck out of the design and then tap the filled pan on your countertop a few times to get the bubbles out of the way so the design on the top is nicely baked. Also, SPOON the batter into the pan and then run a knife through it. Spooning it will minimize air bubbles.
Adapted from Traditional Ukrainian Cookery
Cake Ingredients:
1 C (344 g/12.1 oz) buckwheat honey
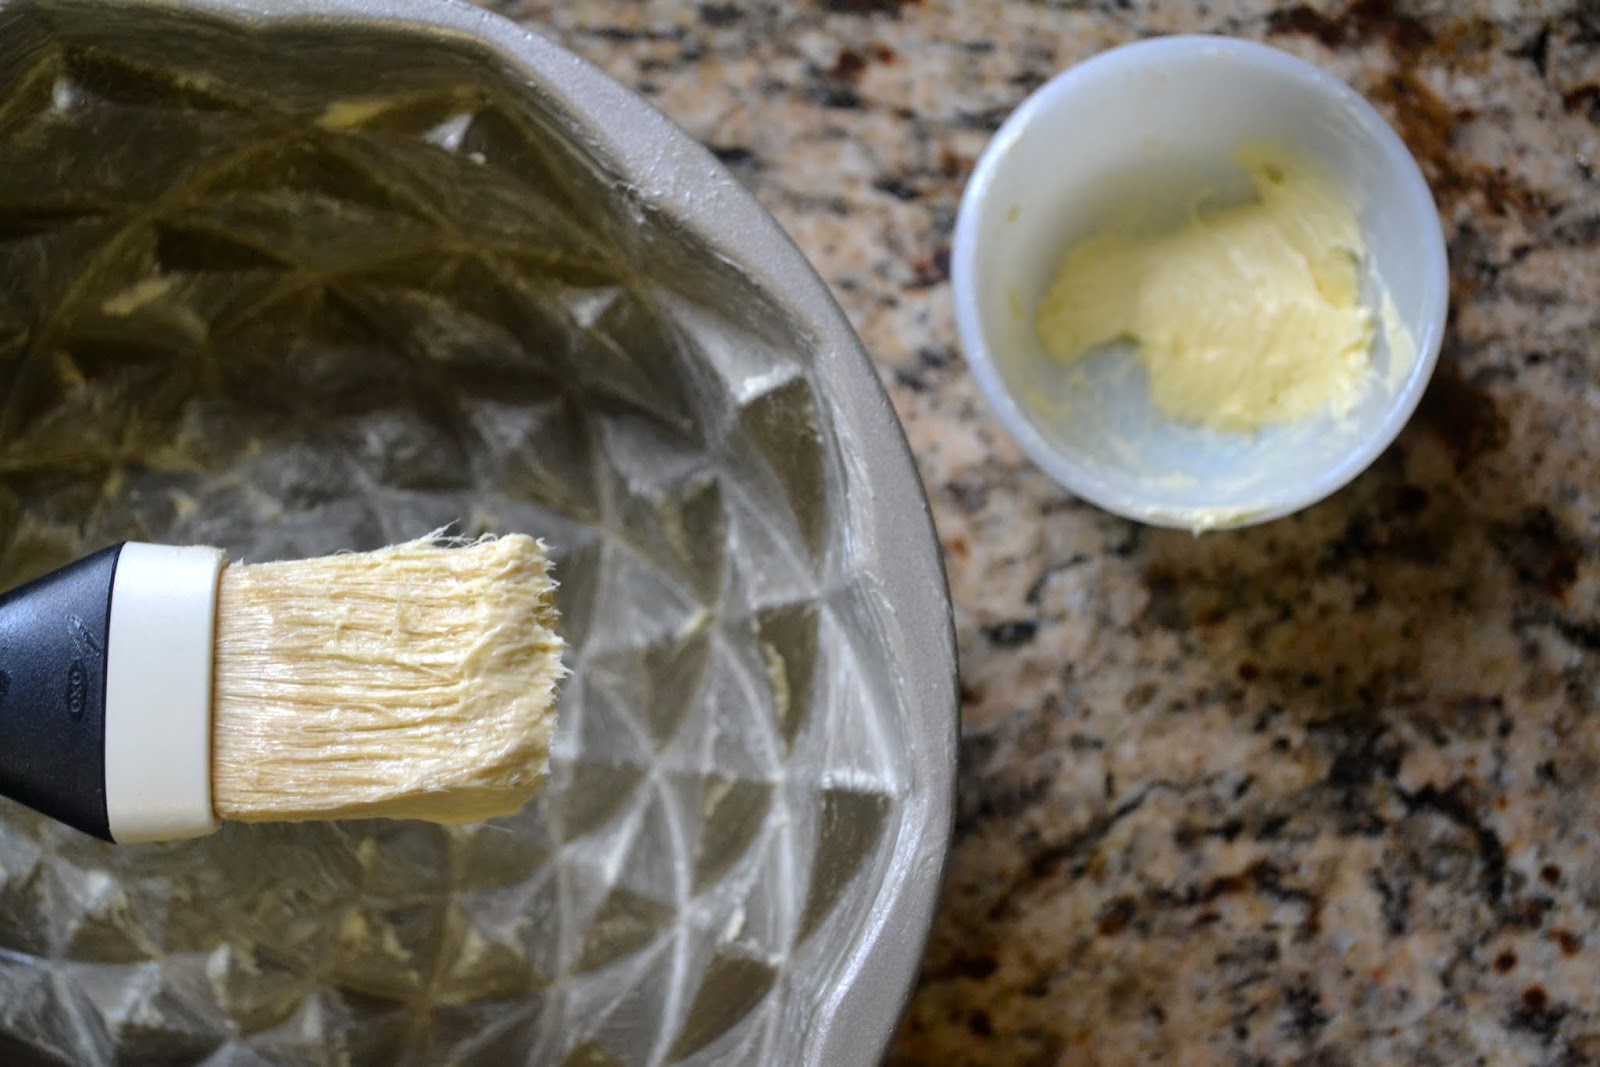
½ C (112 g) unsalted butter at room temperature, plus more for greasing the pan
1 C (207 g) dark brown sugar
4 eggs, separated
3 cups (366 g) sifted all-purpose flour
2 teaspoons (11 g) baking soda
½ teaspoon (3 g) baking powder
1½ teaspoon (3 g) ground cinnamon
¼ teaspoon (2 g) salt
½ teaspoon (1 g) ground cardamom
1 cup (244 g) sour cream
1 t vanilla
Drizzle Ingredients:
¼ cup (37 g) powdered sugar
½ teaspoon almond extract
4-5 teaspoons heavy whipping cream
Boil:
Place the buckwheat honey in a medium-sized saucepan, and bring to a boil. Once it boils, remove it from the heat, and set it aside to cool, preferably for at least 30 minutes.
Grease, Flour, Preheat:
Heavily grease the bundt pan, being sure to get butter into all of the cracks and crevices if your bundt design is intricate. Once all surfaces are covered with butter, flour the pan and tap out the excess. Set the pan aside. Adjust the oven so a rack is at the middle level and then one rack just below it. (If you think your pan might overflow, put a rimmed baking sheet on the lower rack and bake the cake on the rack that is at the middle level in the oven.). Preheat to 325⁰F. (Note that towards the end of baking, the temperature will be lowered.)
Sift, Cream, Mix, Bake, and Rest:
Sift together the flour, baking soda, baking powder, salt, cinnamon, and cardamom. Sift together the same ingredients again, to ensure they are evenly mixed, and set aside. In a separate bowl, cream the butter and sugar until the mixture is light and fluffy. Add the yolks one at a time, beating until incorporated. Beat in the vanilla. Add a little of the butter mixture to the cooled honey, and stir until they are mixed. Add the honey mixture to the remaining butter mixture, and beat until incorporated. Add the flour and sour cream in three additions (add ⅓ of the flour mixture and beat, then ⅓ of the sour cream and beat, then flour again, then sour cream, then flour, then sour cream). In a separate bowl, whip the egg whites until stiff peaks form. Stir ⅓ of the stiff egg whites into the batter. (This will lighten the batter and make it easier to fold in the remaining egg whites.) Fold in the remaining eggs whites in two steps (i.e., fold in ⅓ and then the remaining ⅓). Spoon the mixture into the prepared pan. Run a knife through the batter to release any bubbles and then strike the pan on the counter a few times to help remove any remaining bubbles. (This is so you get a clear design.) Bake at 325⁰F for 40 minutes then lower the oven to 300⁰F for 20-25 minutes, or until a cake tester comes out clean. Cool on a rack for 10 minutes and then invert onto a wire rack and allow to fully cool. Once the cake is cool, place it in a cake saver (or on a cookie sheet and put a large bowl over the top) for 3-4 days so the flavors can develop.
Mix, Drizzle, Eat:
On the day you plan on eating the cake (3-4 days after the cake has been made), prepare the drizzle. In a small bowl, mix the powdered sugar with the almond extract. Add the heavy whipping cream a ½ teaspoon at a time until the mixture is a pourable consistency, but isn’t overly runny. You want the icing to be able to run down the sides of the cake, but not so runny that it completely goes off of the cake and pools on your serving plate. If you make it too runny, just add a little more powdered sugar to thicken it back up. Transfer the cake to a serving plate. Line a glass with a ziplock bag and transfer all of the icing to the bag. Snip the tiniest hole in the corner of the bag and drizzle the icing over the cake. Slice and serve! Store any leftovers at room temperature in a sealed container.


Pin It

2 comments:
Absolutely beautiful!!! I bet it was sooo yummy.
Thanks! :)
Post a Comment